Stop Failing on Averages: How to Gate Your CI Pipeline with Artillery's p99

Last quarter, a team shipped a routine API update. The load test ran clean — average response time of 118ms, well under their 300ms threshold, green across the board. The pipeline passed. The deploy went out. Twenty minutes later, support tickets started coming in. For roughly 1 in 100 users, checkout was timing out. Not slow. Timing out. When they dug into the numbers, the p99 was sitting at 4.2 seconds. The average was fine. It was always fine. The tail was silently on fire.
This is the most common blind spot in load testing setups: gating your CI pipeline on average response time. Averages are statistically valid and practically useless when what you care about is whether your worst-served users have an acceptable experience. The good news is Artillery already has everything you need to fix this. Most engineers just never scroll far enough in the docs to find it. This post shows you exactly where to look and how to wire it into your pipeline in under 30 minutes.
Why Averages Lie in Load Tests
Averages collapse a distribution into a single number, and in doing so they throw away the most important part of the story. Imagine an endpoint that responds in 80ms for 95 out of 100 requests, but takes 3 seconds for the remaining 5. The average comes out somewhere around 230ms. That number looks reasonable. It might even look good. But 5% of your users just had a terrible experience, and your threshold never blinked.
This is called a bimodal distribution, and it shows up constantly in real API traffic. Fast responses cluster around one value and slow responses cluster around another, with a gap in between. When you average them together you get a number that doesn't accurately represent either group.
The situation gets worse under load. As concurrency increases, that slow tail tends to grow disproportionately. A p99 that sits at 400ms under light traffic can balloon to 3 seconds when you push 200 concurrent users through the same endpoint. The average might climb from 90ms to 140ms and still look perfectly healthy on your CI dashboard while a meaningful slice of your users are staring at a spinner.
The metric that actually captures this is the percentile. A p99 of 500ms means 99% of your requests completed within 500ms. That last 1% is exactly where your most frustrated users live, and it is exactly what your pipeline should be watching.
Artillery's ensure Block — The Right Way
Most Artillery configs you'll find in the wild stop at defining phases and scenarios. The test runs, the summary prints, and the pipeline moves on regardless of what the numbers actually say. What makes Artillery genuinely useful as a quality gate is the ensure block, and it's surprisingly underused.
The ensure block lets you define pass/fail thresholds that Artillery evaluates at the end of the test run. If any threshold is breached, Artillery exits with a non-zero code. That single detail is what makes your CI pipeline actually fail instead of just logging a sad report nobody reads.
Here's what the wrong approach looks like. A lot of teams threshold on median because it sounds statistically reasonable and it's the first metric they see in the output. The problem is that median is just p50, which means half your users could be having a miserable experience and the check would still pass.
# Don't do this
ensure:
  p50: 300
Instead, you want to gate on the tail. A solid starting point for most APIs is p95 and p99, combined with a hard cap on error rate. Here's what that looks like:
# Gate on the tail, not the middle
ensure:
  p95: 500
  p99: 1500
  maxErrorRate: 1
This tells Artillery to fail the run if 5% of requests exceed 500ms, if 1% of requests exceed 1500ms, or if more than 1% of requests return an error. Any one of those conditions is enough to exit with a non-zero code and stop the pipeline.
If any threshold is breached, Artillery will print exactly which ones failed and exit with code 1. If everything passes, it exits with code 0 and your pipeline continues. Simple, deterministic, and no custom scripting required. A complete runnable example is available on our GitHub page so you can try this out in a self-contained environment right away.
Wiring It Into CI
Running Artillery locally is useful during development, but the real value comes when the test runs automatically on every push and blocks a merge if the thresholds are breached. This section shows you how to set that up with GitHub Actions from scratch.
Before writing the workflow, it helps to understand what you are actually asking CI to do. You want three things to happen in sequence: run the load test, save the report as an artifact so you can inspect it later, and fail the pipeline if any threshold is breached. GitHub Actions handles all of this cleanly with a single workflow file.
Setting Up the Workflow File
Inside your repository create a folder called .github/workflows if it does not exist already, then create a file inside it called load-test.yml. This is the file GitHub Actions will pick up automatically.
The workflow needs to know when to trigger. For a load test you typically do not want it running on every single push to every branch since it adds time to the pipeline. A reasonable default is to run it on pull requests targeting your main branch and on direct pushes to main. Here is how you declare that:
name: Load Test

on:
  push:
    branches:
      - main
  pull_request:
    branches:
      - main
Defining the Job
Next you define the job itself. It runs on a standard Ubuntu runner, checks out the code, installs Node.js and Artillery, spins up the local test server via Docker, runs the test and uploads the report. Each step builds on the previous one:
jobs:
  load-test:
    runs-on: ubuntu-latest

    steps:
      - name: Checkout repository
        uses: actions/checkout@v6

      - name: Set up Node.js
        uses: actions/setup-node@v6
        with:
          node-version: 24

      - name: Install Artillery
        run: npm install -g artillery
Starting the Test Server
Since your Artillery config targets a local httpbin instance you need Docker to spin it up before the test runs. GitHub Actions runners have Docker pre-installed so you do not need any extra setup step for it. You just run the container in detached mode so it does not block the rest of the pipeline:
- name: Start httpbin server
        run: docker run -d -p 80:80 kennethreitz/httpbin

      - name: Wait for server to be ready
        run: sleep 5
The sleep 5 gives the container a moment to finish booting before Artillery starts sending requests. It is not elegant but it is reliable for a simple setup like this.
Running the Test and Saving the Report
Now we run Artillery with the output flag so the JSON report gets written to disk. Uploading it as a CI artifact means you can download and inspect it from the GitHub Actions run page even after the job finishes:
- name: Run load test
        run: artillery run artillery-ci-example.yml --output report.json

      - name: Upload report artifact
        uses: actions/upload-artifact@v7
        if: always()
        with:
          name: artillery-report
          path: report.json
The if: always() on the upload step is important. Without it, if the load test fails and exits with a non-zero code, GitHub Actions will skip every subsequent step including the upload. You want the report available precisely when the test fails, so if: always() ensures it gets uploaded regardless of the outcome.
The Complete Workflow
Putting it all together, the full workflow file combines the trigger configuration, the Node.js and Artillery setup, the Docker server spin-up, the test run and the report upload into a single ready-to-commit file. Rather than reproducing it in full here, the complete workflow file is available on our GitHub page alongside the Artillery config from the previous section. You can clone the repo, drop the workflow file into your .github/workflows folder and push it to your repository without any modifications needed.
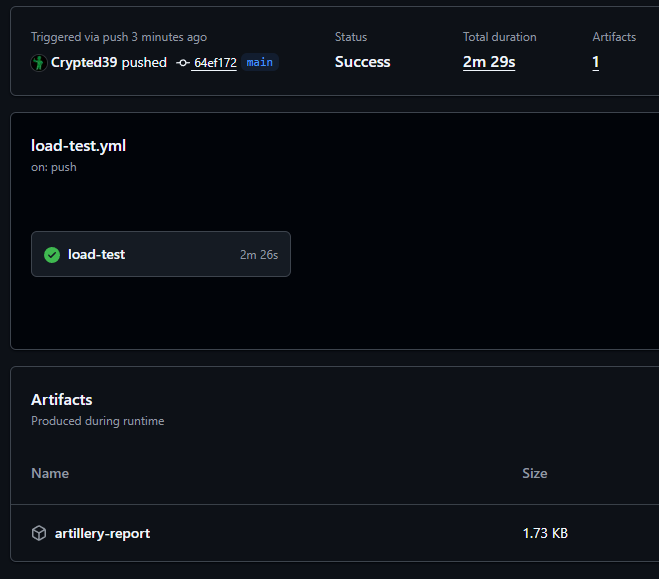
Artillery report saved as a CI artifact after a successful run
Once it is in place, GitHub Actions will pick it up automatically. Every pull request targeting main will now run the load test and block the merge if p95, p99 or the error rate threshold is breached. The report will always be available as a downloadable artifact from the Actions run page so your team can dig into the numbers without needing to reproduce the run locally.
Interpreting a Failed Run
So the pipeline failed. Before you panic or blindly start tweaking thresholds to make the red go away, it helps to know exactly what Artillery is telling you and where to look first.
When an ensure threshold is breached, Artillery prints a clear summary at the bottom of the run output. It will not just tell you that something failed. It will tell you exactly which threshold was violated and by how much. A failed run looks something like this:
Ensuring p95 < 500ms: fail (p95=1423ms)Ensuring p99 < 1500ms: fail (p99=4891ms)
Ensuring maxErrorRate < 1: pass
This tells you two things immediately. Your error rate is healthy so the server is not crashing under load. But your tail latency is severely degraded, with p95 nearly three times over the threshold and p99 over three times the limit. That pattern usually points to a specific endpoint being slow rather than a systemic infrastructure problem.
What to Do Next
Once you have identified which thresholds are breaching, resist the urge to loosen the numbers to make the pipeline green again. Instead treat the breach as a signal and dig one level deeper. Check whether the slowness correlates with a specific arrival rate phase in the CLI summary output, whether it appeared after a recent code change, or whether the database query count spikes during that scenario. The CLI output gives you the what. Your application logs and traces give you the why.
Common Mistakes to Avoid
Getting Artillery wired into CI is straightforward once you know the pattern. But there are a few mistakes that quietly undermine the whole setup and are worth knowing about before they bite you.
Setting Thresholds Too Loose to Ever Fail
This one is more common than it sounds. A team sets up ensure for the first time, runs the test, sees the p99 sitting at 800ms and sets the threshold to 2000ms to give themselves "breathing room." The pipeline stays green forever, nobody questions it, and the threshold stops being a quality gate and becomes decoration. A good rule of thumb is to run your baseline test a few times, take the highest p99 you observe and add no more than 20 to 30 percent on top of that as your threshold. It should be tight enough that a meaningful regression actually trips it.
Running Too Short a Test Phase
Percentiles need a statistically meaningful sample size to be trustworthy. A 10 second test with 5 virtual users might only generate 30 to 50 requests. A p99 calculated from 50 requests means exactly one request is determining that number, which tells you almost nothing. As a general guideline your sustained load phase should run for at least 60 seconds at your target arrival rate before you trust the percentile output. The warm up phase does not count toward this since its job is to ramp up, not to generate representative data.
Not Accounting for External Dependencies in CI
When your test runs locally against a Docker container the environment is stable and isolated. When it runs in CI it is making real network calls, hitting real infrastructure and sharing resources with whatever else is running in your pipeline at that moment. If your thresholds are calibrated purely from local runs they may be too tight for CI and you will get flaky failures that have nothing to do with your application. Run the test in CI a handful of times under normal conditions first, observe the percentiles and calibrate your thresholds from that environment specifically.
Conclusion
Most load testing setups are passive. The test runs, the summary prints, someone glances at it, and the deploy goes out anyway. Adding an ensure block with percentile thresholds is a small change to your config but it fundamentally shifts what your load test actually is. It stops being a report that someone has to interpret and becomes a gate that enforces a standard automatically.
Averages will keep lying to you if you let them. Your worst served users do not live in the average. They live in the tail, and the tail is exactly where production incidents are born. Watching p95 and p99 in your pipeline costs you nothing extra and gives your team a shared, objective definition of what acceptable performance actually looks like.
The complete example including the Artillery config and the GitHub Actions workflow is available on our GitHub page. Clone it, run it locally, push it to your own repo and see what your tail latency actually looks like under load. You might be surprised by what the average has been hiding.