Automated web security testing with ZAP

Let's talk a little bit about security testing, specifically web application security testing.
The goal of web application security testing is to ensure that the application is secure and can protect sensitive data and systems from unauthorized access or attack. It is an important step in the development process, as it helps identify and fix security weaknesses before they can be exploited by attackers.
It can take many forms, depending on the needs and goals of the application, like vulnerability scanning, static code analysis, penetration testing, or dynamic testing of the application.
As you can imagine, the subject of web application security testing is vast. To not make a book out of this blog post, we will focus on a tool designed to help developers and security professionals identify and fix vulnerabilities in web applications. We will see how that tool can be integrated with Selenium, and at the end, we will talk about the pros and cons of automated web application security tests.
ZAP (Zed Attack Proxy)
The tool we just mentioned is called ZAP. It's an open-source web application security scanner maintained under the umbrella of the Open Web Application Security Project (OWASP).
OWASP is a worldwide non-profit organization that is dedicated to improving the security of web applications. To achieve this goal, OWASP maintains a number of projects and initiatives, like the OWASP Top Ten, OWASP Security Knowledge Framework, and OWASP Web Security Testing Guide. To learn more about OWASP, visit their official website.
Back to ZAP. It's a web application security testing tool that works by proxying traffic between a client and a web application. When we use OWASP ZAP to test a web application, it acts as a middleman between our web browser and the application, allowing us to intercept and modify the requests and responses that are exchanged between the two. It includes many tools and features that allow us to analyze and test the security of web applications, including a web proxy, a spider, a scanner, and multiple customization options.
Let's go to the fun part.
ZAP installation and startup
The installation process is straightforward. Just visit the official download site and download ZAP for your operating system. Once downloaded, open the installer and finish all steps.
Since we are going to use the ZAP API in this article, we are not that interested in its UI. So instead of starting the application with the GUI, we will start it in headless mode with the terminal (or command prompt).
On Windows, we need to position ourselves in the same folder where the zap.bat file is and execute the following command:
zap.bat -daemon -port 8090
ZAP will start listening on port 8090 on our localhost without opening a GUI.
In the command prompt, we will see a similar message to this one:
[ZAP-daemon] INFO org.zaproxy.addon.network.ExtensionNetwork - ZAP is now listening on localhost:8090
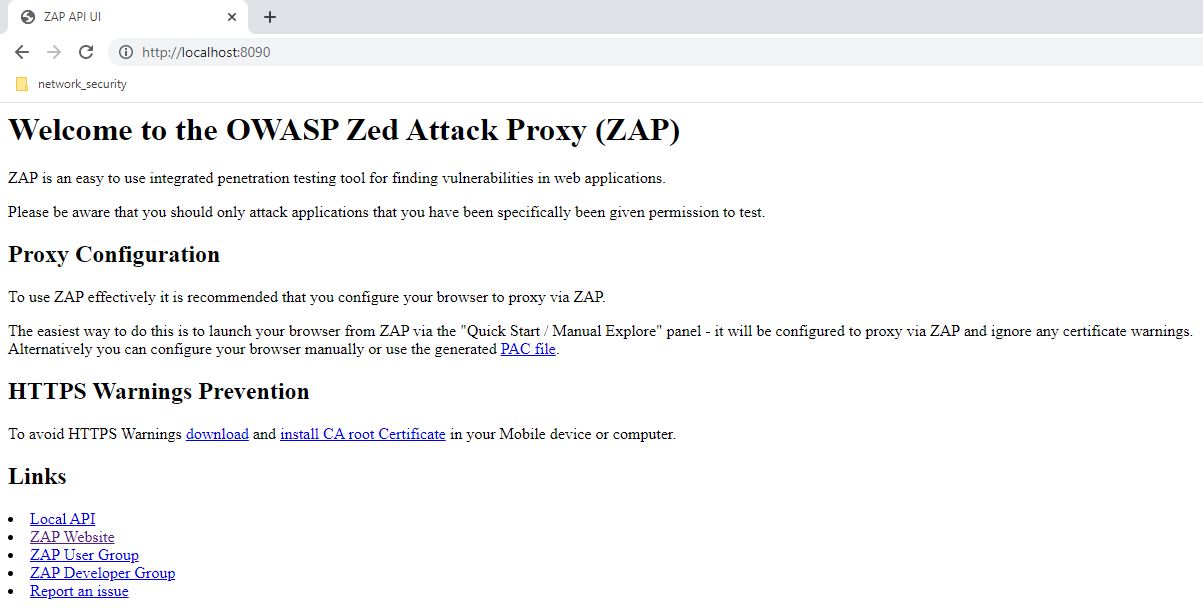
And if we navigate in our browser to localhost:8090, we will see a page like this one:
To run ZAP via the command line on a different operating system, use this guide.
Defining the target
We will be using one of ZAP's tools, called Active Scan, which performs known attacks on a website, and by doing that, tries to find potential vulnerabilities. Since it attacks the specified website, we should NOT do it if we don't own it.
Now there are a couple of alternatives that can help us out here. One of them is OWASP Juice Shop. It's an intentionally insecure web application written in JavaScript and designed to teach web application security. It is a "vulnerable by design" web application that allows users to practice identifying and exploiting common web vulnerabilities, or in other words, perfect for our example.
To use it, we can navigate to the GitHub repo and follow any setup guide, or we can just use the already deployed instance on Heroku.
ZAP tools that we will use
We have our target set up, and we have installed ZAP. The next thing we are going to do is write a class that will utilize some of ZAP's core features. The features that we are interested in for this article are Spider and Active Scan.
Spider is a tool that can automatically crawl web applications in order to discover new URLs and content. It works by starting at a specific URL and then following links to other pages within the same domain. As it crawls the site, it sends HTTP requests to the server and records the responses. It can be used to discover hidden content or to identify vulnerabilties in a web application, such as cross-site scripting (XSS) or SQL Injection vulnerabilities.
Active Scan, on the other hand, is a process that analyzes a web application to identify potential vulnerabilities. During an active scan, ZAP will send a series of requests to the target application and analyze the responses to identify possible security issues.
One of the benefits of using an active scan is that it can identify vulnerabilities that may not be apparent just by reviewing the application's source code or by manually testing the application. However, active scans can also be resource-intensive and may cause performance issues on the target application, so they should be used with caution.
An important thing to mention here is that if we ran the Active Scan before the Spider, it wouldn't do anything. To understand why we need to explain something called a site tree.
The site tree in ZAP is a representation of the structure of a web application. It shows all of the URLs that have been discovered by the ZAP spider or by manual testing, organized in a tree-like structure based on their relationships to one another. It can be a useful tool for understanding the layout and organization of a web application, and for identifying areas of the application that may be of particular interest for testing or analysis.
In ZAP, the concepts of exploring and attacking an app are separated. This means if we don't run the Spider, the site tree will be empty, and the Active Scan has no understanding of the web application and its content. And because of that cannot start performing any attacks on it.
Now that we know how the tools work, let's write some code.
Writing the Scanner class
First things first, we need to import our dependencies. We will create a Maven project and import the ZAP client API, Selenium Java, and TestNG in the pom.xml file:
<dependencies>
  <!-- https://mvnrepository.com/artifact/org.zaproxy/zap-clientapi -->
  <dependency>
      <groupId>org.zaproxy</groupId>
      <artifactId>zap-clientapi</artifactId>
      <version>1.11.0</version>
  </dependency>
  <!-- https://mvnrepository.com/artifact/org.seleniumhq.selenium/selenium-java -->
  <dependency>
      <groupId>org.seleniumhq.selenium</groupId>
      <artifactId>selenium-java</artifactId>
      <version>4.7.2</version>
  </dependency>
  <!-- https://mvnrepository.com/artifact/org.testng/testng -->
  <dependency>
      <groupId>org.testng</groupId>
      <artifactId>testng</artifactId>
      <version>7.7.1</version>
      <scope>test</scope>
  </dependency>
</dependencies>
We will call our class SecurityScanner and initialize the following variables and objects:
import org.zaproxy.clientapi.core.ClientApi;

public class SecurityScanner {

    static final String ZAP_ADDRESS = "localhost";
    static final int ZAP_PORT = 8090;
    private static final String ZAP_API_KEY = ""; //insert your API key
    static ClientApi api = new ClientApi(ZAP_ADDRESS, ZAP_PORT, ZAP_API_KEY);
}
Since we are running ZAP locally, the address is going to be localhost. We will use the same port we specified when running ZAP via the command line. And to get the API key, there are two ways:
Let's write our Spider method. It's easy to implement it with the ZAP client API. We only need to call the scan method from the spider class. That will kick off the Spider scan. From the response that the scan method provides, we can get the current scanId. We will use that scanId to poll the current status of the Spider and print out the progress in percentage. Once finished, we will call the results method and print out all URLs that have been found.
Our method will only take one parameter, and that will be the URL of our target:
public static void executeSpiderScan(String targetUrl) {
  System.out.println("Spidering target : " + targetUrl);
  String scanId;

  try {
      int progress;
      ApiResponse response = api.spider.scan(targetUrl, null, null, null, null);
      scanId = ((ApiResponseElement) response).getValue();
      do {
          Thread.sleep(1000);
          progress = Integer.parseInt(((ApiResponseElement) api.spider.status(scanId)).getValue());
          System.out.println("Spider progress : " + progress + "%");
      } while (progress < 100);
      System.out.println("Spider completed!");
      List<ApiResponse> spiderResults = ((ApiResponseList) api.spider.results(scanId)).getItems();
      System.out.println("Following resources have been found:");
      spiderResults.forEach(System.out::println);
  } catch (Exception e) {
      System.out.println("Exception caught: " + e.getMessage());
      e.printStackTrace();
  }
}
The first part of our Active scan method is very similar to our Spider one. The difference is that we now call the methods from the ascan class:
public static void executeActiveScan(String targetUrl, String reportName) {
  System.out.println("Active scanning target : " + targetUrl);
  String scanId;
  try {
      int progress;
      ApiResponse response = api.ascan.scan(targetUrl, "True", "False", null, null, null);
      scanId = ((ApiResponseElement) response).getValue();
      do {
          Thread.sleep(5000);
          progress = Integer.parseInt(((ApiResponseElement) api.ascan.status(scanId)).getValue());
          System.out.println("Active scan progress : " + progress + "%");
      } while (progress < 100);
      System.out.println("Active scan completed!");
  } catch (Exception e) {
      System.out.println("Exception caught: " + e.getMessage());
      e.printStackTrace();
  }
}
In comparison to the previous method, for this one, we want to generate an HTML report since its response contains a lot of information regarding the possible vulnerabilities found in the tested web application.
To do that, we will compose a URL that ZAP generates after the active scan finishes. We will request the content of that URL and write it to a file stored in our reports directory:
URL url = new URL("http://" + ZAP_ADDRESS + ":" + ZAP_PORT + "/OTHER/core/other/htmlreport/?apikey=" + ZAP_API_KEY);
HttpURLConnection connection = (HttpURLConnection) url.openConnection();
connection.setRequestMethod("GET");
int responseCode = connection.getResponseCode();
if(responseCode == 200) {
    BufferedReader in = new BufferedReader(new InputStreamReader(connection.getInputStream()));
    BufferedWriter out = new BufferedWriter(new FileWriter("src/reports/" + reportName + ".html"));
    String line;
    while ((line = in.readLine()) != null) {
        out.write(line);
        out.newLine();
    }
    in.close();
    out.close();
} else {
    throw new MalformedURLException("Url could not be accessed! Response code was " + responseCode);
}
That's it. Let's write our testing class.
Writing the test class
The test class will be simple. We will need the URL of the website we are scanning. Depending on how you have set up Juice Shop, it might be different for you. And besides the URL, we will need an email and a password to log in to the application:
public class SecurityTest {

  private WebDriver driver;
  private static final String TARGET_URL = "https://juice-shop.herokuapp.com/#/";
  private static final String EMAIL = "test@fakemail.com";
  private static final String PASSWORD = "Juice123!";
}
In our BeforeMethod, before we initialize our ChromeDriver, we will set the proxy for our webdriver instance. We will also ignore certificate errors since Chrome will mark the website as insecure:
@BeforeMethod
public void setup(){
    String proxyServerUrl = SecurityScanner.ZAP_ADDRESS + ":" + SecurityScanner.ZAP_PORT;
    Proxy proxy = new Proxy();
    proxy.setHttpProxy(proxyServerUrl);
    proxy.setSslProxy(proxyServerUrl);

    ChromeOptions chromeOptions = new ChromeOptions();
    chromeOptions.addArguments("--start-maximized");
    chromeOptions.addArguments("--ignore-ssl-errors=yes");
    chromeOptions.addArguments("--ignore-certificate-errors");
    chromeOptions.setProxy(proxy);
    driver = new ChromeDriver(chromeOptions);
}
The test itself will have the following flow:
Luckily for us, most of the Juice Shop tags have IDs. We will also add some calls to the sleep method to make sure that the test doesn't break before the last active scan:
@Test
public void juiceShopSecurityAssessment() throws InterruptedException {
    driver.get(TARGET_URL);
    SecurityScanner.executeSpiderScan(TARGET_URL);
    SecurityScanner.executeActiveScan(TARGET_URL, "beforeLoginReport");
    Thread.sleep(2000);
    driver.findElement(By.className("close-dialog")).click();
    Thread.sleep(2000);
    driver.findElement(By.id("navbarAccount")).click();
    Thread.sleep(2000);
    driver.findElement(By.id("navbarLoginButton")).click();
    driver.findElement(By.id("newCustomerLink")).click();
    driver.findElement(By.id("emailControl")).sendKeys(EMAIL);
    driver.findElement(By.id("passwordControl")).sendKeys(PASSWORD);
    driver.findElement(By.id("repeatPasswordControl")).sendKeys(PASSWORD);
    Thread.sleep(2000);
    driver.findElement(By.id("mat-select-value-3")).click();
    Thread.sleep(2000);
    driver.findElement(By.id("mat-option-3")).click();
    driver.findElement(By.id("securityAnswerControl")).sendKeys("something");
    driver.findElement(By.id("registerButton")).click();
    Thread.sleep(2000);
    assertTrue(driver.findElement(By.xpath("//h1[text()='Login']")).isDisplayed());
    driver.findElement(By.id("email")).sendKeys(EMAIL);
    driver.findElement(By.id("password")).sendKeys(PASSWORD);
    driver.findElement(By.id("loginButton")).click();
    Thread.sleep(2000);
    if(driver.findElement(By.xpath("//button[@aria-label='Show the shopping cart']")).isDisplayed()) {
        SecurityScanner.executeActiveScan(TARGET_URL, "afterLoginReport");
    }
}
And in the AfterMethod, we will just quit the driver:
@AfterMethod
public void tearDown() {
    driver.quit();
}
Executing the test class
When we execute our test class, the Spider scan will first list all found resources. The output will be similar to this one:
Spidering target : https://juice-shop.herokuapp.com/#/
Spider progress : 100%
Spider completed!
Following resources have been found:
https://juice-shop.herokuapp.com/robots.txt
https://juice-shop.herokuapp.com/ftp
https://juice-shop.herokuapp.com/
https://juice-shop.herokuapp.com/runtime.js
https://juice-shop.herokuapp.com/sitemap.xml
https://juice-shop.herokuapp.com/styles.css
https://juice-shop.herokuapp.com/assets/public/favicon_js.ico
https://juice-shop.herokuapp.com/main.js
https://juice-shop.herokuapp.com/polyfills.js
https://juice-shop.herokuapp.com/vendor.js
After that, the Active scan will run and generate a report before the user is logged in:
Active scanning target : https://juice-shop.herokuapp.com/#/
Active scan progress : 8%
Active scan progress : 43%
.
.
Active scan progress : 84%
Active scan progress : 100%
Active scan completed
And another Active scan will be executed once the user is logged in, and we end up with two reports.
Analyzing the results
If we take a look at our reports, they will look similar to the following one:
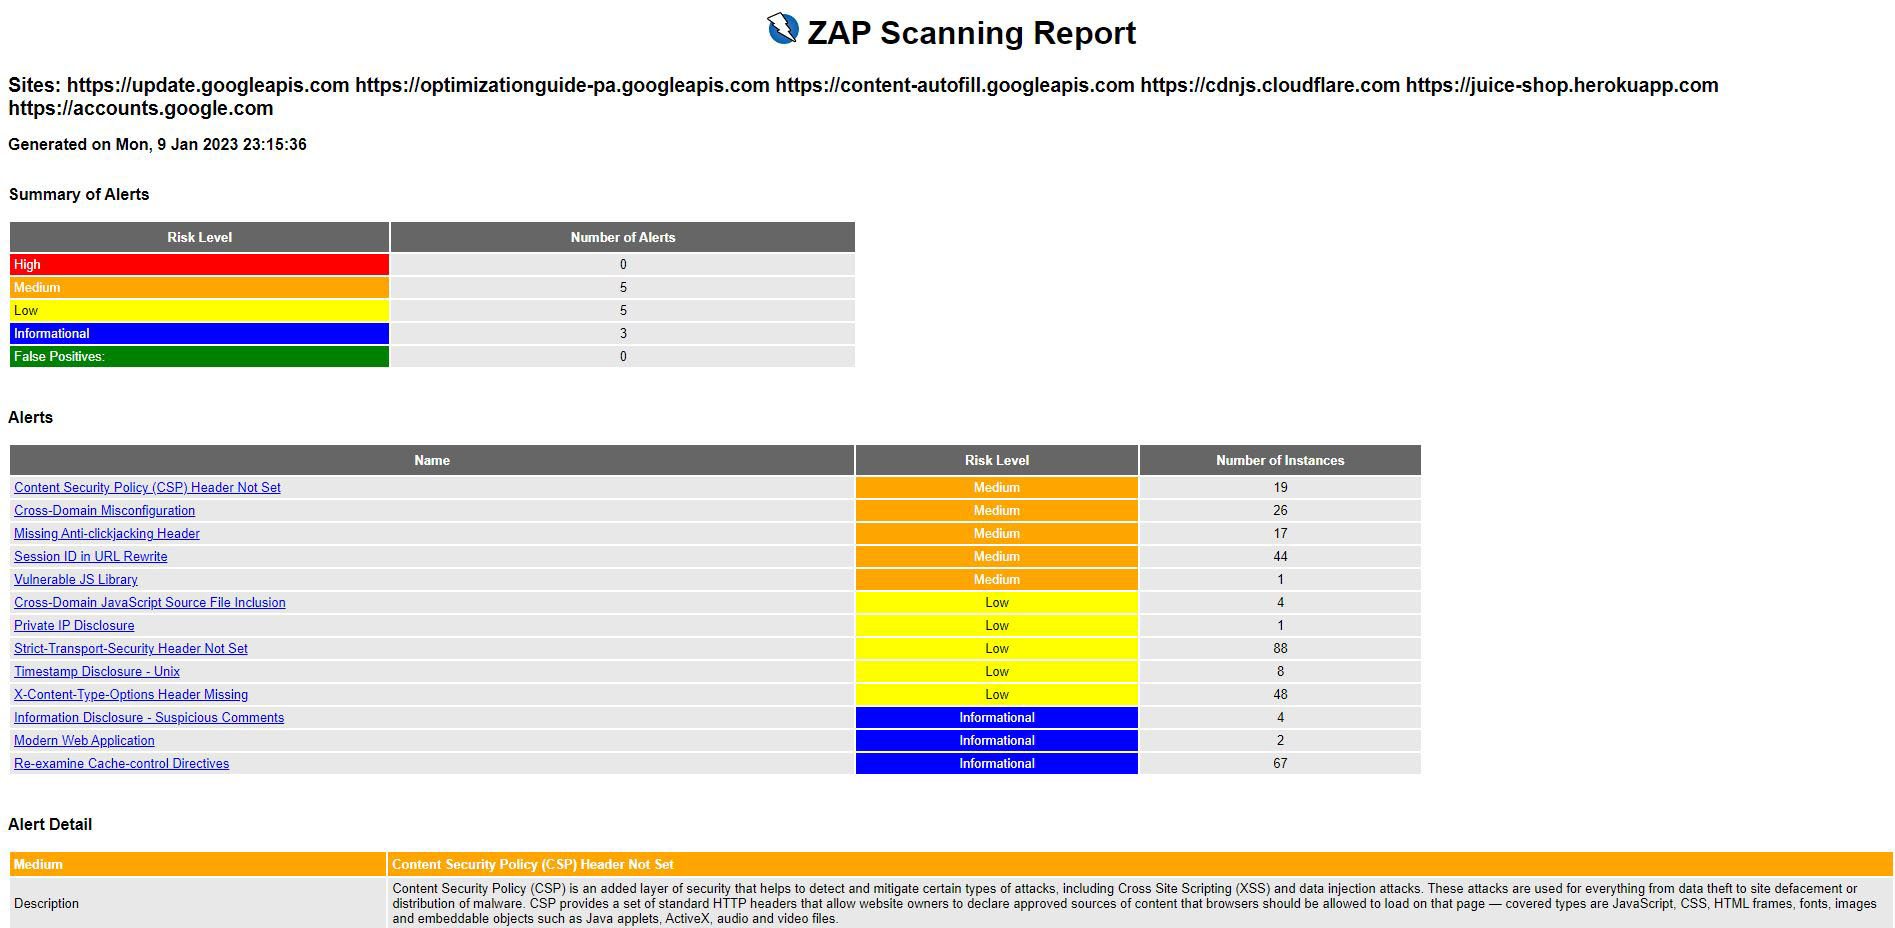
The report will list all of the vulnerabilities that were found by the scan, along with details about each vulnerability, such as the risk level, the URL where the vulnerability was found, and a description of the issue.
We can use this information to prioritize which vulnerabilities to fix first and how to do that. It is also a good idea to review the report to make sure that the scan did not produce any false positives (i.e., vulnerabilities that do not exist in the application).
Why did we execute the Active scan twice (once for the logged-out user and once for the logged-in one), you might ask?
Certain functionality or pages might only be available to logged-in users, and so the scan would not be able to test for vulnerabilities in those areas when the user is not logged in. Another reason is that the application's security controls might be different for logged-in versus non-logged-in users. For example, the application might have stricter input validation or more robust security checks in place for logged-in users, which could result in fewer vulnerabilities being detected when a user is logged in.
By looking at our reports, we can see that more alert instances have been found when the user was logged in.
Pros and cons
Most of the pros for automating security tests are similar to the pros when automating different test types like:
On the other hand, the cons would be:
OWASP ZAP is an open-source web application security scanner designed to automatically find security vulnerabilities in web applications and help developers fix them.
Some of the main tools ZAP provides are the Spider which automatically crawls web applications to discover new URLs and content, and the Active scan, which sends a series of requests to the target application and analyzes the responses to identify possible security issues.
ZAP also generates reports that provide many benefits like vulnerability tracking, prioritization, understanding of the issues, compliance, and education.
In general, it is a good idea to use a combination of automated and manual testing to ensure a web application is secure.
ZAP has many more features we didn't cover here, like passive scanning, contexts, and authentication methods. To learn more about them, visit the OWASP ZAP Features page.
In case you are interested in the complete code used in this blog post, visit the following GitHub page. See you later!