A Beginner's Guide to Using FlaUI for Windows Desktop App Automation

FlaUI stands at the intersection of simplicity and robustness, offering an accessible entry point for beginners venturing into the realm of desktop automation. Designed specifically for Windows, FlaUI provides a user-friendly interface and comprehensive features tailored to the nuances of desktop applications.
In this beginner's guide, we'll embark on a journey through the fundamentals of desktop automation with FlaUI. We'll explore its installation process, delve into basic scripting concepts, and showcase practical examples to illustrate its capabilities. By the end of this guide, we'll have a solid foundation in using FlaUI to automate our Windows desktop applications, empowering us to streamline workflows and unlock newfound efficiency. So, let's dive in and discover the world of FlaUI automation together.
Getting Started with FlaUI
FlaUI is an open-source .NET library that empowers us to automate testing of user interfaces (UI) in Windows applications. Whether we're working with modern applications built with frameworks like WPF or legacy Win32 programs, FlaUI provides the tools to interact with buttons, menus, text boxes, and other UI elements programmatically. This allows us to write automated tests that simulate user interactions and verify the application's behavior, ensuring a robust and reliable user experience.
Prerequisites:
For our IDE of choice, we will choose Visual Studio. If you haven't downloaded it yet, head over to the Visual Studio website and grab the latest version. During installation, make sure to include the C# .NET desktop development workload. This workload equips us with the necessary tools to build our project.
Once Visual Studio is up and running, we'll create a new project. Since we're focusing on testing an existing application, a streamlined unit test project is ideal. To achieve this, we'll select the "Unit Test Project (.NET Framework)" template with C#.
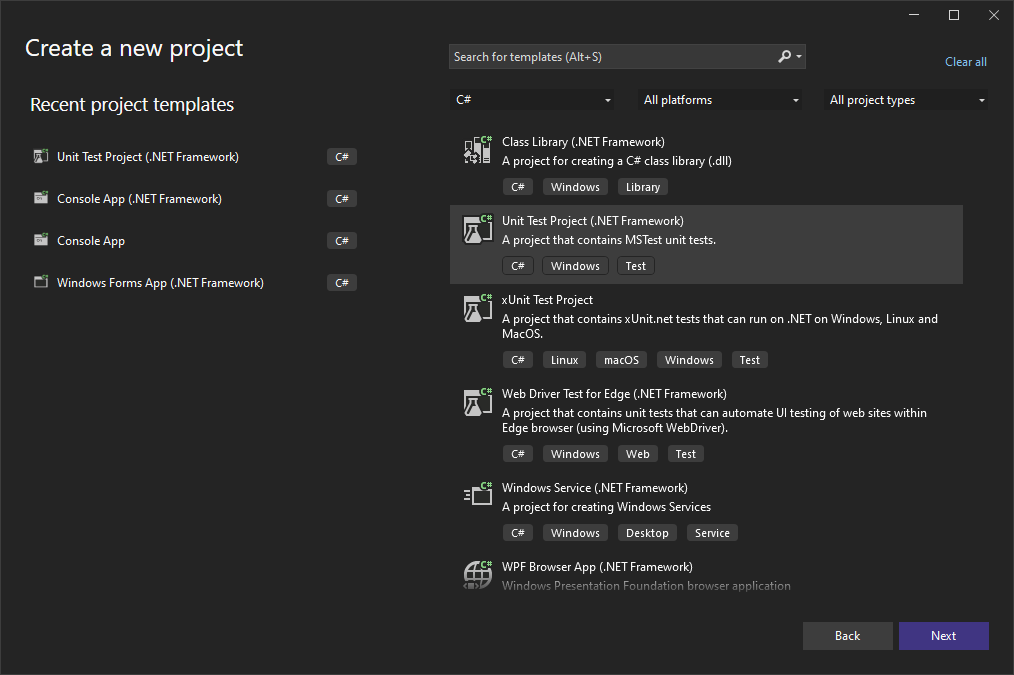
Unit testing project template in Visual Studio
Installing FlaUI Libraries:
Now, let's integrate FlaUI into our project. We'll use the built-in NuGet package manager. Right-click on your project name in the Solution Explorer and select "Manage NuGet Packages..."
The NuGet Package Manager window will open. Navigate to the "Browse" tab and search for "FlaUI". You'll see several results, but three are particularly relevant:
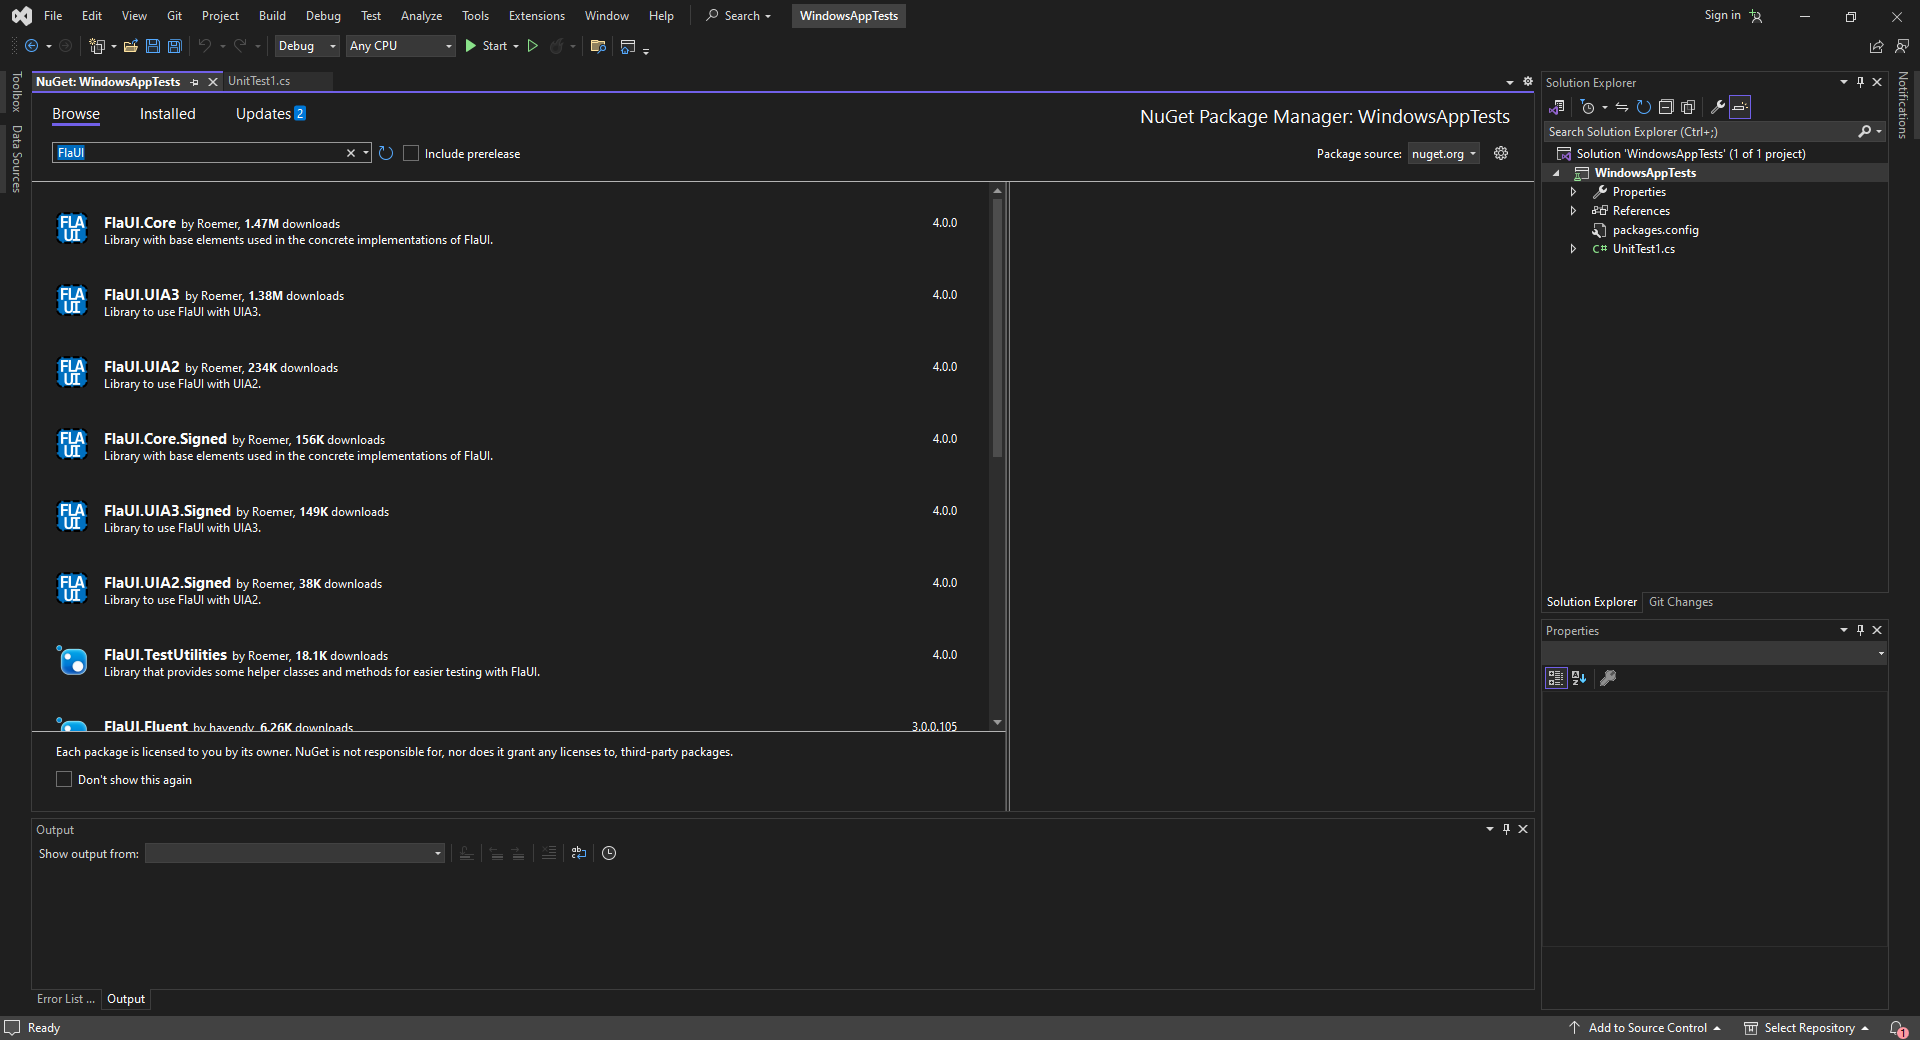
NuGet package manager
The FlaUI library we choose depends on the application we're targeting:
With FlaUI installed, we're ready to write our first Windows application test! But before we jump into coding, let's explore how to access elements within our target application.
Inspecting Target Applications with FlaUInspect
FlaUInspect is a free, dedicated tool that helps us examine the building blocks of a Windows application's user interface.
Installation:
To streamline the installation process, we'll leverage a popular Windows package manager called Chocolatey. Chocolatey simplifies the installation of various software tools, including FlaUInspect. Before we proceed, it's important to ensure we have administrative privileges on our machine. We'll also need to open a PowerShell window as administrator.
Once we have the appropriate permissions and PowerShell window open, we simply run the following command to install Chocolatey:
Set-ExecutionPolicy Bypass -Scope Process -Force; [System.Net.ServicePointManager]::SecurityProtocol = [System.Net.ServicePointManager]::SecurityProtocol -bor 3072; iex ((New-Object System.Net.WebClient).DownloadString('https://community.chocolatey.org/install.ps1'))
This command retrieves the installation script from the official Chocolatey website and executes it. Once Chocolatey is installed, installing FlaUInspect becomes a breeze. We just run the following command in our PowerShell window:
choco install flauinspect
Launching FlaUInspect:
There are two ways to launch FlaUInspect:
Choosing the Automation Mode:
Upon launch, FlaUInspect presents us with a choice between UIA2 and UIA3 automation modes. UIA3 is the recommended option for modern Windows applications, while UIA2 might be necessary for older programs. Select the appropriate mode based on your target application.
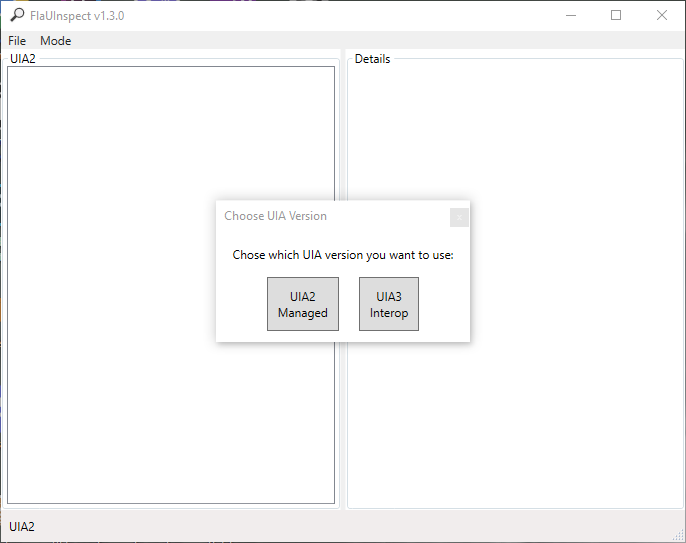
FlaUInspect automation modes
Inspecting Elements:
FlaUInspect displays two main panels. The left panel shows a hierarchical tree representing the application's UI elements. The right panel displays detailed information about the currently selected element in the tree. To inspect an element on the screen, simply hover your mouse over it and press the Control key (or another key as configured in the settings). This will highlight the element in the tree view and populate the right panel with its properties.
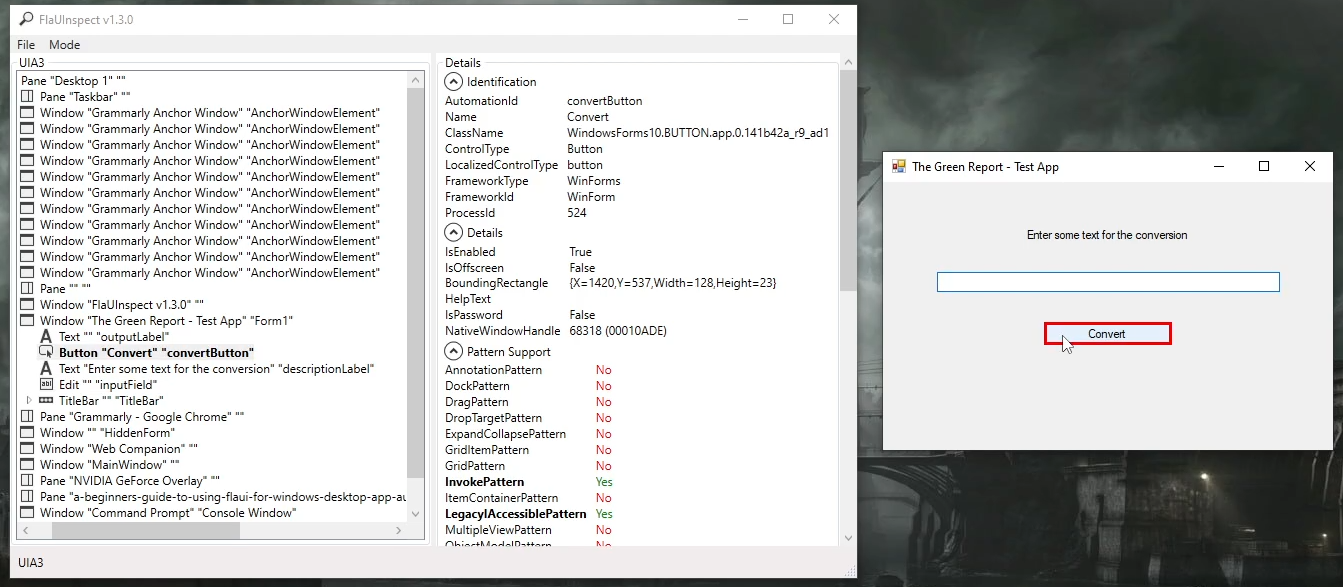
FlaUInspect element inspection
Note: You might need to enable Hover Mode by clicking the "Mode" option in the menu bar and selecting "Hover Mode."
FlaUInspect provides valuable information about each element, including:
By navigating through the tree view in FlaUInspect, we can understand the relationship between different UI elements within the application. This helps us identify the most appropriate element to target in our tests to achieve the desired outcome.
Writing the Tests
Armed with the knowledge of our target application's UI elements from FlaUInspect, let's dive into writing automated tests using FlaUI!
Application under test:
Before we dive into the code, let's take a moment to understand our testing application. It's a simple program with a label that prompts the user to enter text in an input field. Once the user enters some text, they can click the "Convert" button. Clicking the button converts the entered text to all lowercase letters and displays the result below the button.
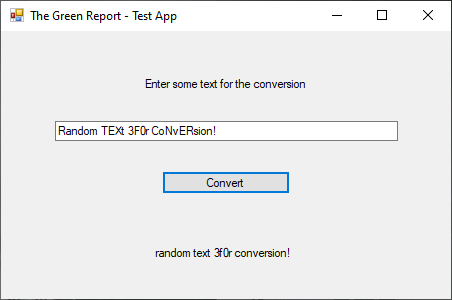
Application under test GUI
With that said, let's look at some code.
Imports:
First, we import the required libraries for writing our test code. We use the Microsoft.VisualStudio.TestTools.UnitTesting namespace for defining test methods and assertions. Additionally, we import the FlaUI libraries necessary for interacting with UI elements in Windows desktop applications.
using Microsoft.VisualStudio.TestTools.UnitTesting;
using FlaUI.UIA3;
using FlaUI.Core.Conditions;
using FlaUI.Core.AutomationElements;
using FlaUI.Core;
Test setup:
Next, we proceed by defining a test class named TextConversionTests. Within this class, we establish the Setup method, annotated with [TestInitialize]. This method serves to initialize our application, retrieve the main window, and configure the condition factory using FlaUI.
namespace TextConversionTests {
    [TestClass]
    public class TextConversionTests {

        private Application application;
        private Window mainWindow;
        private ConditionFactory cf;

        [TestInitialize]
        public void Setup() {
            application = Application.Launch("path-to-your-windows-application.exe");
            mainWindow = application.GetMainWindow(new UIA3Automation());
            cf = new ConditionFactory(new UIA3PropertyLibrary());
        }
Moving forward, we define two test methods: VerifyApplicationLabel and VerifyApplicationConversionFunctionality. These methods encapsulate the verification of specific functionalities within our application.
First test case:
The first method verifies that the label displaying the description in our application matches the expected text "Enter some text for the conversion":
[TestMethod]
public void VerifyApplicationLabel() {
    Label descriptionLabel = mainWindow.FindFirstDescendant(
        cf.ByAutomationId("descriptionLabel")
        ).AsLabel();
    Assert.AreEqual("Enter some text for the conversion", descriptionLabel.Text);
}
Within the main application window, this code snippet pinpoints the UI element bearing the automation ID descriptionLabel. It achieves this through the employment of the FindFirstDescendant method. This method embarks on a search for the initial descendant element that aligns with the specified condition, which is cf.ByAutomationId("descriptionLabel"). This condition is meticulously constructed via the ByAutomationId condition factory method.
After finding the UI element, the AsLabel() method is called to convert it into a Label object. This conversion allows us to interact with the element as a label, providing access to properties and methods specific to label elements.
The assertion compares the text content of the label descriptionLabel.Text with the expected text "Enter some text for the conversion". If they match, the test passes; otherwise, it fails.
Second test case:
The second method tests the conversion functionality of our application. It enters a specific text into the input field, triggers the conversion process by clicking a button, and then verifies that the output label displays the converted text in lowercase.
The first line defines the text that will be entered into the input field for conversion.
string conversionText = "TEst mE out!";
Then the next sequence finds the input field UI element, converts it to a TextBox object, and enters the conversionText into it.
mainWindow.FindFirstDescendant(cf.ByAutomationId("inputField"))
    .AsTextBox()
    .Enter(conversionText);
After that, we find the button UI element responsible for triggering the conversion, converts it to a Button object, and simulates a click action.
mainWindow.FindFirstDescendant(cf.ByAutomationId("convertButton"))
    .AsButton()
    .Click();
The next thing we need to do is find the output label UI element and convert it to a Label object.
Label outputLabel = mainWindow.FindFirstDescendant(cf.ByAutomationId("outputLabel"))
    .AsLabel();
The final step involves verifying if the output label text (outputLabel.Text) matches the converted text after converting both to lowercase (conversionText.ToLower()). A match indicates a successful test, while any discrepancy results in a test failure.
Assert.AreEqual(conversionText.ToLower(), outputLabel.Text);
Test teardown:
Lastly, we ensure proper resource management with the implementation of a cleanup method annotated with [TestCleanup]. This method executes after each test method, ensuring that resources are effectively released.
[TestCleanup]
public void Cleanup() {
    application.Close();
}
Test Execution
Once we've written our FlaUI tests, it's time to put them to the test (pun intended)! Here's how to run them within Visual Studio:
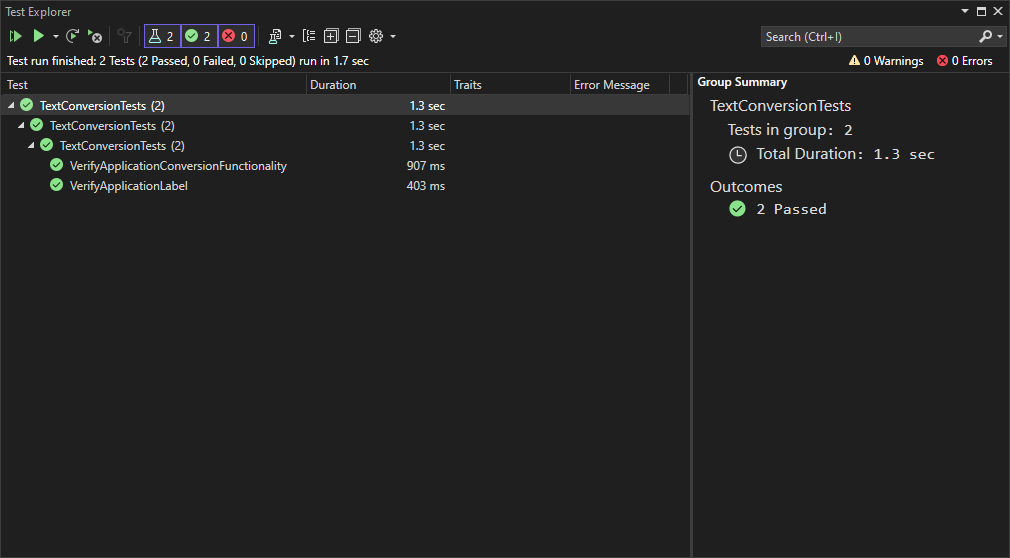
Test Explorer window
Additional Tips:
By following these steps and leveraging Visual Studio's testing capabilities, we can efficiently run our FlaUI tests and ensure the smooth operation of our automated processes.
Conclusion
In conclusion, FlaUI presents a robust and accessible solution for automating Windows desktop applications. By following the steps outlined in this guide, you've acquired the foundational knowledge to embark on your journey into UI automation with FlaUI. Further exploration of the resources provided below will allow you to deepen your understanding of FlaUI's capabilities and best practices. With dedication and practice, you'll progress toward streamlining your workflows and attaining enhanced efficiency through automated testing.
Additional Resources:
If you'd like to try the example mentioned above, I'll add the code and the application used for testing to our GitHub page. Have fun!